Add analytics to your Next.js websites! (Super Easy!)
by Anish
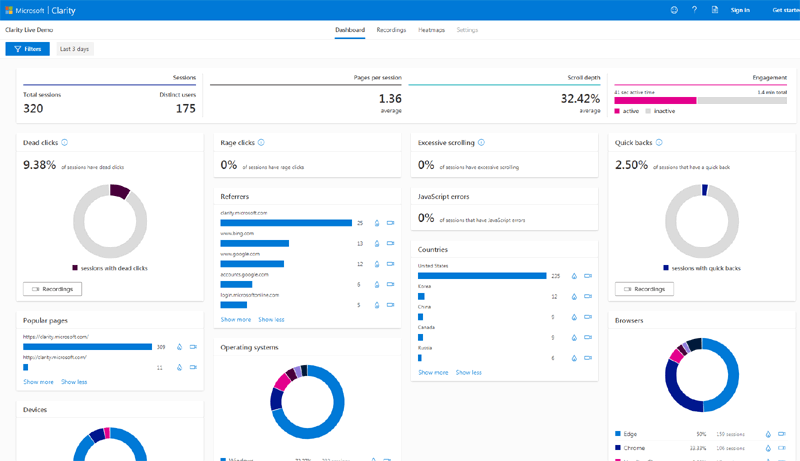
Wanna know how many peeps visited your site last week? How many clicks the form got? Which is most visited page?
Then you should definitely try out Microsoft Clarity! But What is it?
Microsoft Clarity is a powerful tool that helps you understand how users interact with your website. It provides insights into user behavior, allowing you to identify areas for improvement and optimize your website’s performance. And the best part? It’s free!
Why Add Microsoft Clarity to Your Next.js Website?
As a Next.js developer, you’re likely no stranger to the importance of website performance. With Microsoft Clarity, you can:
Identify performance bottlenecks and optimize your website’s speed
Understand how users interact with your website, including clicks, scrolls, and rage clicks (yes, that’s a thing!)
Improve your website’s user experience and increase conversions
Get recordings of every visit and also summarise it with AI!
Awesome innit?! So lets get started…
1. Create a free account
Go to the Clarity webiste and create a free account.
2. Create a new project

Click on New project and add name and your website URL.
3. Get tracker code
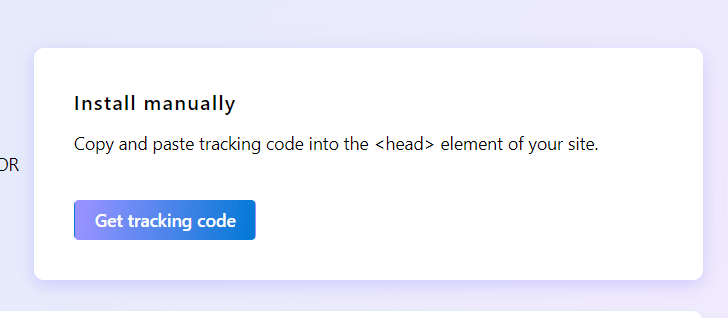
Click on “Install manually”
4. Create a new component Clarity.tsx
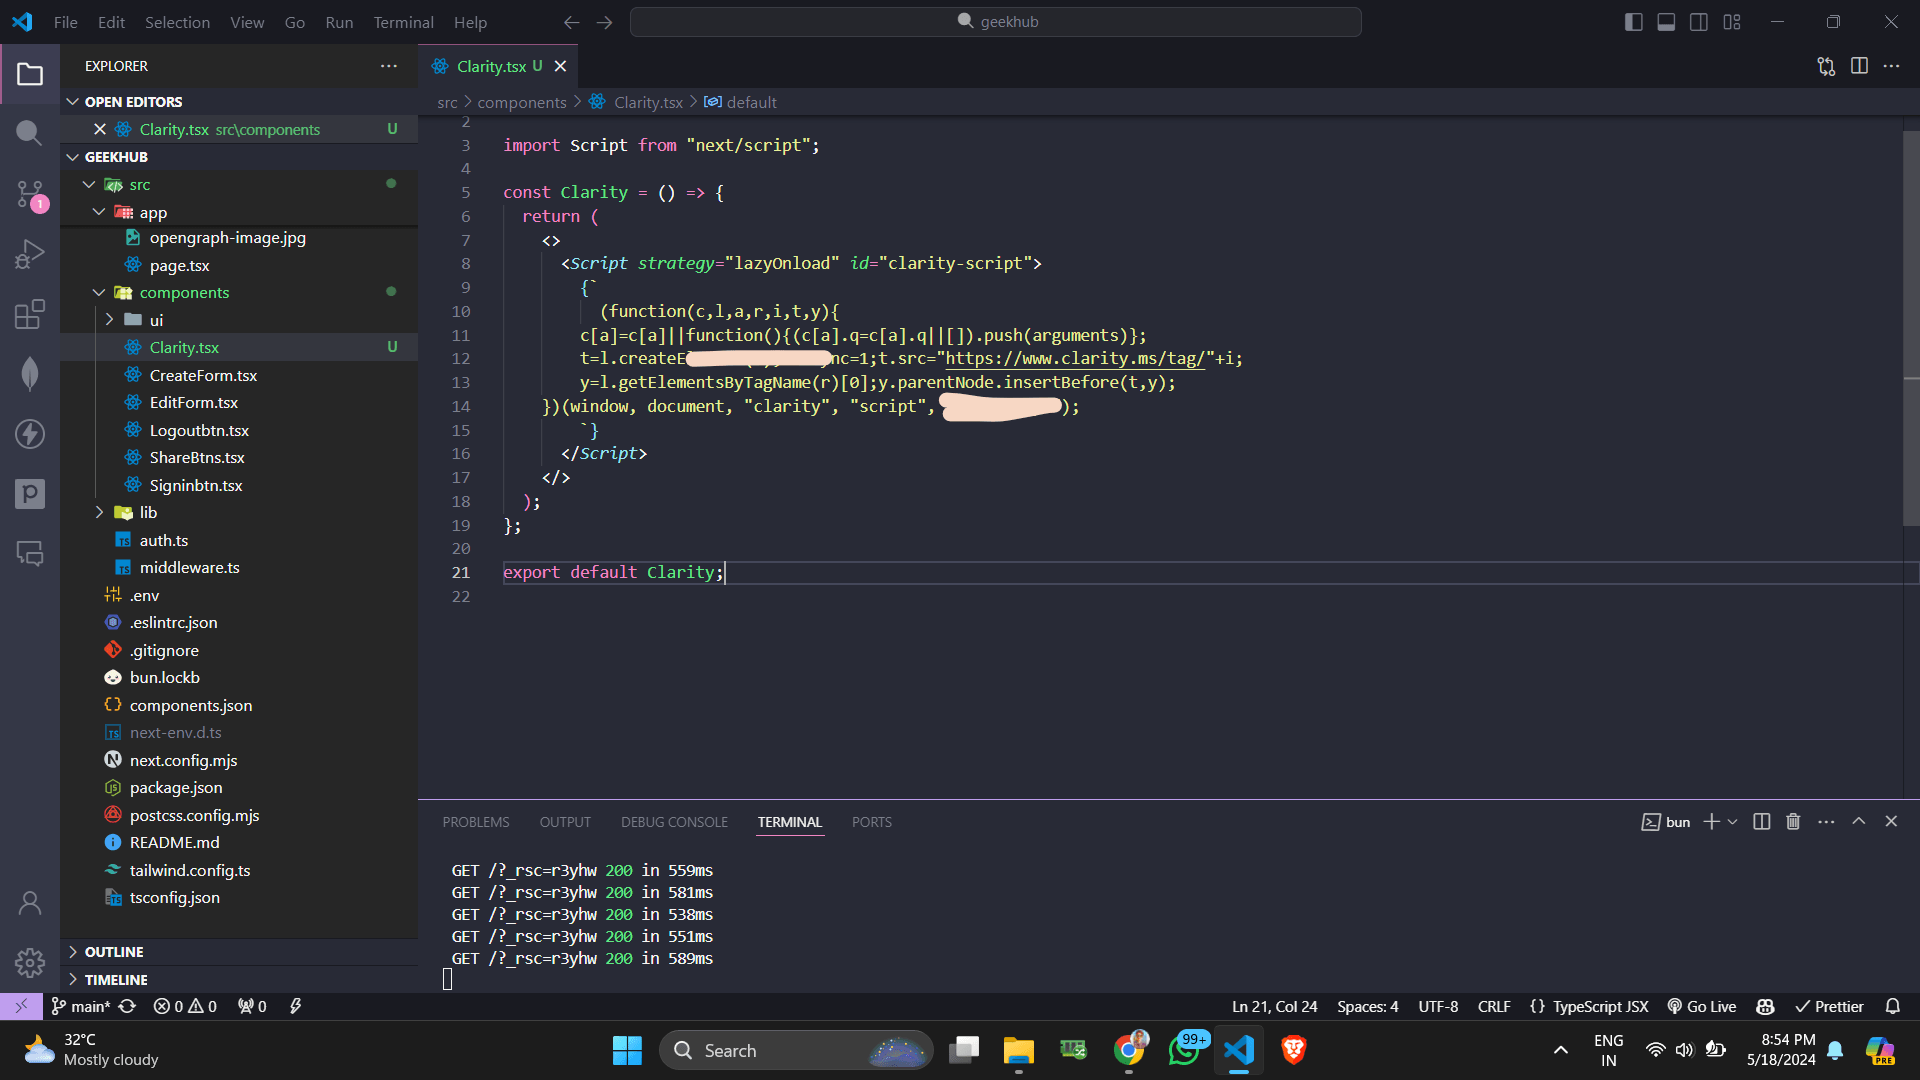
"use client";

import Script from "next/script";

const Clarity = () => {
  return (
    <>
      <Script strategy="lazyOnload" id="clarity-script">
        {`
          (function(c,l,a,r,i,t,y){
        c[a]=c[a]||function(){(c[a].q=c[a].q||[]).push(arguments)};
        t=l.createElement(r);t.async=1;t.src="https://www.clarity.ms/tag/"+i;
        y=l.getElementsByTagName(r)[0];y.parentNode.insertBefore(t,y);
    })(window, document, "clarity", "script", "CLARITY_ID");
        `}
      </Script>
    </>
  );
};

export default Clarity;
Replace The CLARITY_ID, with your unique ID that will be given. You basically need to replace the script function they’ll provide with the function here.
5. Import the Clarity.tsx component in layout.tsx
import Clarity from "@/components/Clarity";

// now inside <html> but before the body tag, add this :

{process.env.NODE_ENV === "production" ? <Clarity /> : null}
And That’s It!
You’ve successfully added Microsoft Clarity to your Next.js website. Now, you can start using Clarity to optimize your website’s performance and improve the user experience.
What’s Next?
Start exploring your Clarity dashboard to uncover insights into your website’s performance. Identify areas for improvement and make data-driven decisions to boost your website’s speed and user experience.